
I have always had a fascination with miniature villages. I could just look at them for hours. The firm I used to work for puts up a snow village at the holidays, and I was excited to get involved my first year working there. Over the years, even though I don't work there anymore, we have remained friends and I have kept doing the village, and each year we keep doing it bigger and better. It's gotten to the point now where I get so involved in it that I basically takeover the whole project and everyone else just lets me work! Ha! After a few years of doing it, we found that we couldn't wait until December to do a village, so we started doing a Halloween village in the fall. Eventually, when the holidays were over, we got so depressed having to take down the Christmas village that we decided that we needed to have an Easter village! It's now to the point that there is a village up almost year round, and if there isn't one on the table, it looks empty. For me it's an addiction! When we did the Halloween and Christmas villages this year, I was strictly blogging about fashion, but rest assured that this year all the villages that I do will make the blog! Although this is my first time doing an Easter village, I have done villages a lot of times now, so I have learned some great tips for easy things you can do to make your village really stand out from the rest! But first, enjoy the "after" pictures:


The first question to ask yourself is "Where am I going to display my village?" If you do a Christmas one, then you've probably already got a spot worked out. My advice is to find a spot where you can devote the entire piece of furniture to the village. We have tried doing one in the past where we had other things on one end of the table, but it kind of defeats the purpose of trying to make it look real if you are putting things on your display platform that aren't part of the village. Also, this kind of goes without saying, but put it somewhere it will be seen! Clients LOVE the villages! Chances are, your visitors will too, so make sure you set it up in an area where you allow guests.

I actually do a double-display, but for the demonstration, I'm just showing this table. This is a standard 4' by 12" table. It works great for villages. We can squeeze about 12 of the Easter houses on it and about 8-9 of the Halloween/Christmas houses because they are a little bigger.

What you will need:
Apart from the buildings and figurines, I used standard size Ivy garland, a 4' x 12" moss mat (which happened to be exactly the same size as the table! #craftingwin), Easter string lights, and miniature craft wire fencing. All of these items except the fencing were purchased at Joann's. The fencing I ordered online here.

Step 1: Lay down the grass mat. You may need to put books on top of it to weigh it down if it's not laying flat from being rolled up in the package.


Step 3: Lay the ivy garland along the back edge of the table. In my opinion, the biggest mistake people make with villages is not doing a "background". Most people do use something for the "ground", (like white cotton snow in the Christmas villages) but they don't think about putting anything between the wall and the houses. To me, having something there makes the whole scene look more "real." Instead of the houses backing up to a wall, they back up to something that resembles a forest or thicket.

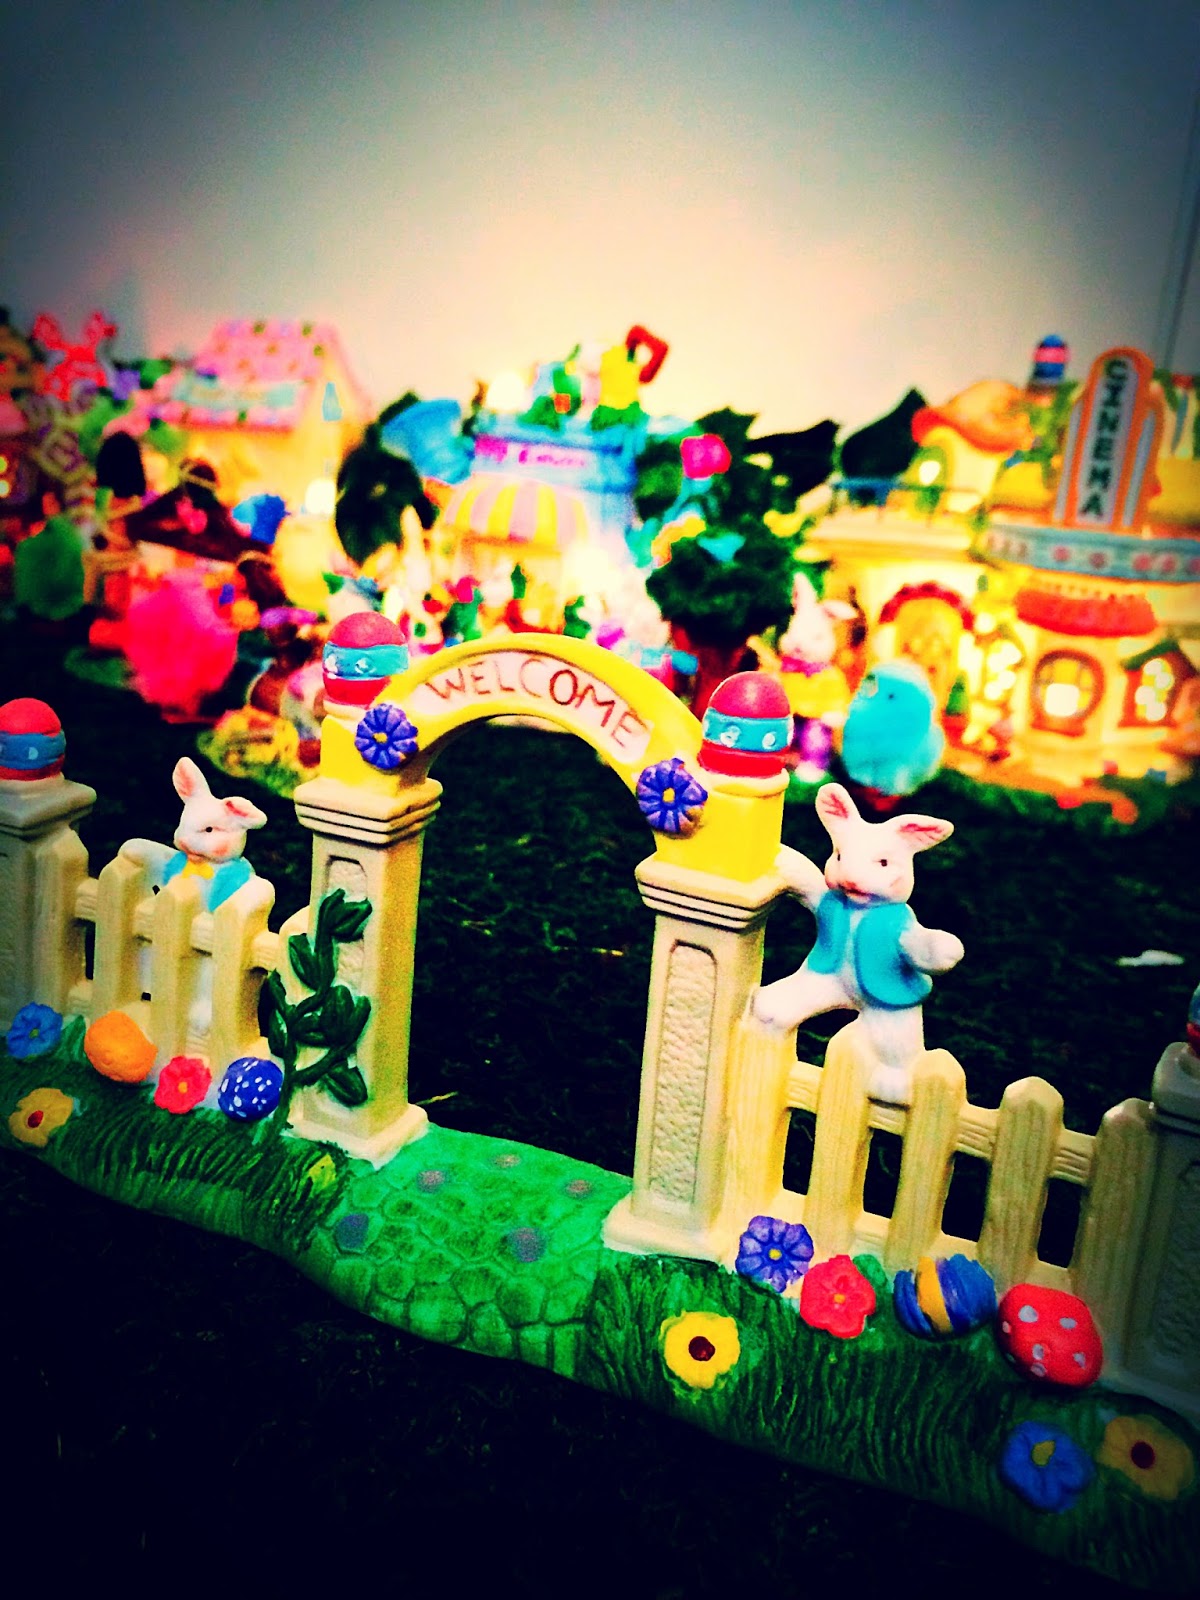
Step 4: Arrange the wire fencing around the table. This part is kind of tedious with the fencing. If it's not wanting to stand up by itself, make sure you have your corners bent at at least 90 degree angles. I would even go a little more acute than that. It seemed to work for me.

Step 5: Add your buildings! This village is called the Cottontale Collection. It's old, and not in production anymore, but it's very easy to find. I got these from eBay. They were going for an average of $8.00 each, but should be even cheaper off-season if you can wait for it. We wanted a lot of houses to fill the space, but you can make a great looking village with just 4-5 buildings. Just make sure you get some of the figurines as well. The figurines will really bring your village to life!

Step 6: Enjoy Your Village!


.jpg)
No comments